Creating a Campaign
Before setting up a new campaign, first make sure that you are working with the correct website. This is especially important if you are setting up pushes on multiple websites.
First, click on the red button at the top that says “New Campaign”.

You will now need to enter your Notification Title, Link, and Message.
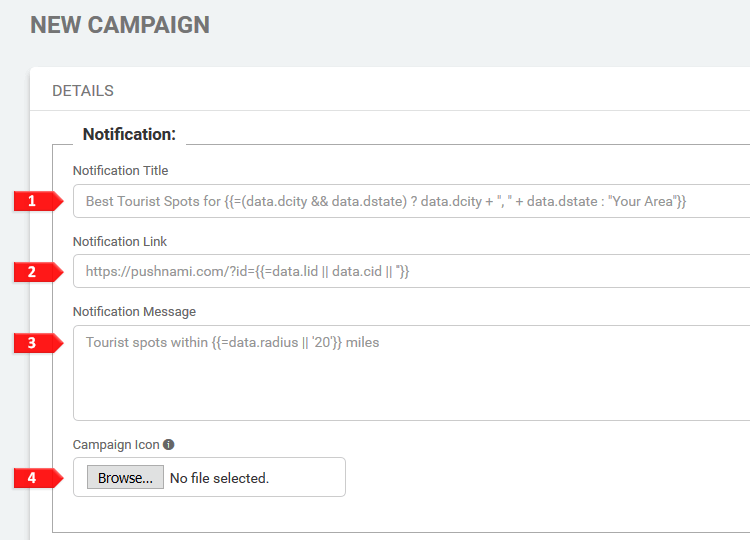
- Title – will appear on the top line of the notification
- Link – the exact URL that you want your subscribers to be directed to
- Message – will appear as the body of the notification
- You will also need to upload an icon if you do not want the default image to be displayed. Do this simply by clicking “Choose File” under the Campaign Icon section of the page. Notice that your campaigncan be previewed on the right hand side of your screen.
Now you will choose whether you want to send the campaign out immediately or at a later time.
Immediate Campaign

Creating an immediate campaign means that the push notification will be sent immediately after you click “Schedule Campaign”. You can do this by clicking “Now” under the Schedule section of the page.
Scheduled Campaign
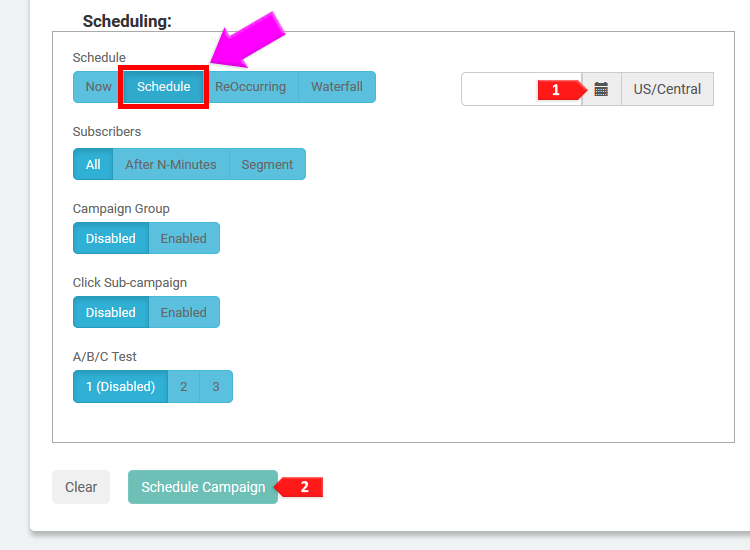
Creating a scheduled campaign allows you to set up a push notification to be delivered at a later date or time. You can do this by clicking “Schedule” under the Schedule section of the page.
- Click on the calendar icon and select your preferred date and time.
- When you are happy with your campaign, click on “Schedule Campaign” at the bottom of the page and your push notification is ready to go.
ReOccurring Campaign
Scheduling a ReOccurring campaign allows you to schedule a campaign to go out on a specific day and time, or on a series of days at a specific time. The campaign will send each week automatically on the day/time you choose.
To schedule a “ReOccurring” campaign click the “ReOccurring” button under “Scheduling”.
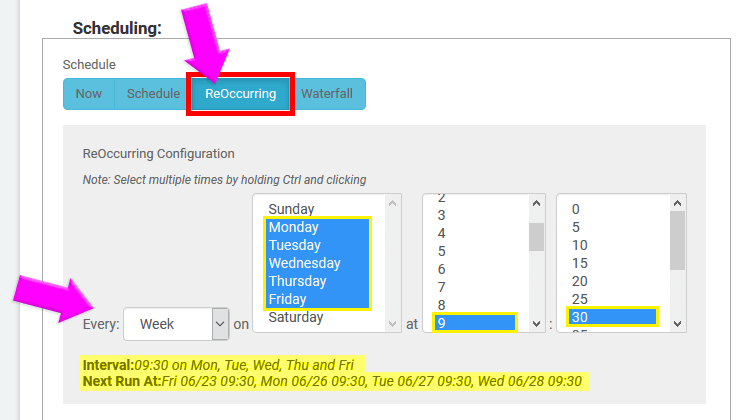
Then choose a series of days of the week and time, or choose one day and time to send your campaign out each week.
Segment a Campaign
Use the “Segment” button for easy access when segmenting your campaign.
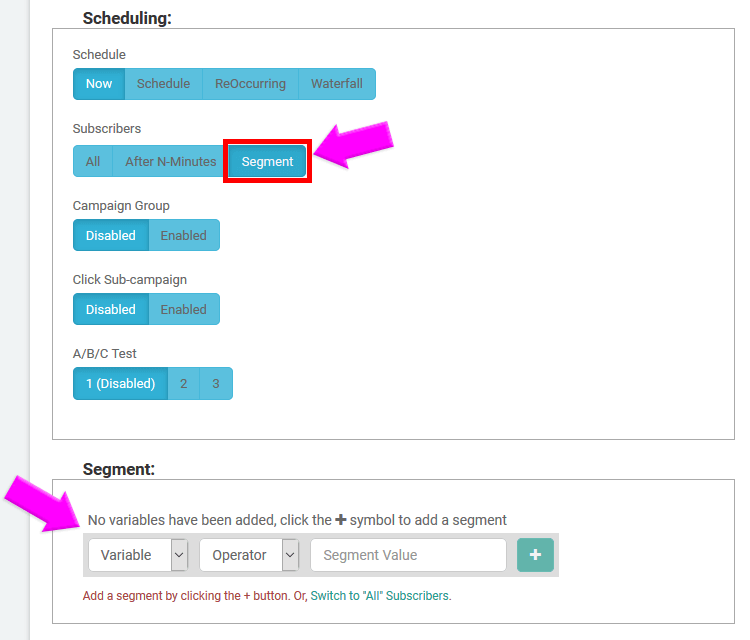
After clicking this option you will get a Segment section to use, simply use the drop downs and click the + to add that segment.
Clone a Campaign
Cloning a campaign will allow you to send out a notification that has already been used, without having to set it up again.
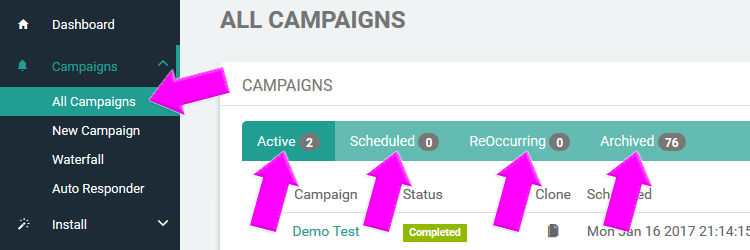
- From the Dashboard click on “Campaigns” from the menu on the left side of the page, and then “All Campaigns” from the drop down list.
- Next, find the campaign you want to clone in either the “Active”, “Scheduled”, “ReOccurring”, or “Archived” tabs.
Once you know what campaign you would like to clone, simply click the “Clone” icon.
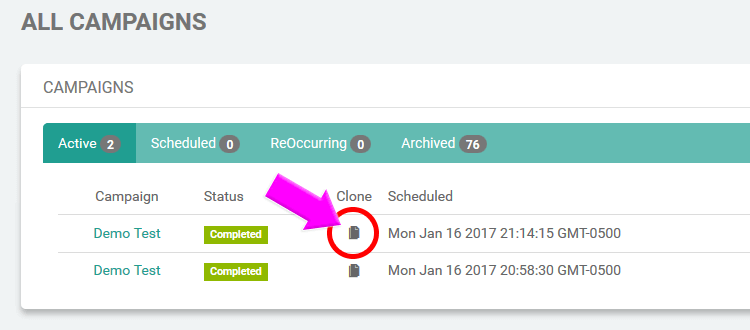
This will open a Clone Campaign, that you can edit the wording, or leave as it is and go through the scheduling process as usual and finish by clicking “Schedule Campaign”.
Clone a Waterfall Campaign

- From the Dashboard click on “Campaigns” from the menu on the left side of the page, and then “Waterfall” from the drop down list.
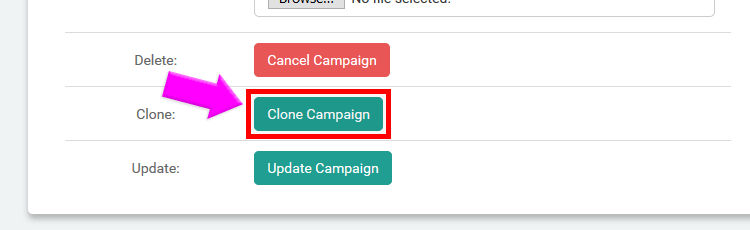
- Next, find the waterfall campaign you want to clone from the list. Once you know what you would like to clone, simply click the blue edit button.
This will open the campaign, scroll to the bottom and click “Clone Campaign”.
Once you click that you can edit the wording, or leave as it is and go through the scheduling process as usual and finish by clicking “Schedule Campaign”.
Add Variables To Campaigns
In order to make your push notification more personal, you may want to add variables such as location or job preference. This can be done when scheduling each campaign and can be added in the Title and/or Message. For example, if you want to include the subscriber’s city as a variable, you might try something like this:
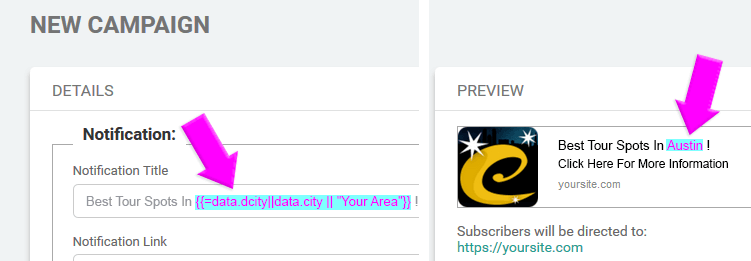
You will notice that there is a list of available variables on the right hand side of your screen, along with a preview of your push notification. In my example above, {{=data.dcity||data.city || "Your Area"}} populated with “Austin” as a sample value. It will populate with the location of your subscriber when it is actually delivered.